Are you experiencing slipping or jerky movements on your treadmill? It could be due to an improperly adjusted belt. But don’t worry, you don’t have to be a professional to fix it yourself.
Treadmills are a popular piece of exercise equipment, and with regular use, the belt can become misaligned or loose. This can cause discomfort during your workout, and even lead to injury if not addressed.
Adjusting your treadmill belt is a simple process that can be done at home with just a few tools. In this step-by-step guide, we will walk you through the process to ensure optimal performance and a safer, more comfortable workout experience.
What Is A Treadmill Belt?
A treadmill belt is a moving surface on which users walk, jog, or run on a treadmill. It is typically made of rubber or PVC and is part of the treadmill that requires adjustment and maintenance to ensure a safe and effective workout. Proper tension and alignment of the treadmill belt are crucial for a comfortable and safe workout experience.
Why Is It Important?
Having a properly adjusted treadmill belt is essential for optimal performance and the safety of the user.
A loose or misaligned belt can be detrimental to the belt and various components, increasing wear and tear, and leading to belt seam separations, uneven wear, and belt speed issues. As such, creating a safety hazard for the user.
An overtightened belt can also cause excessive friction, shortening the lifespan of the belt. To ensure a smooth and frictionless running surface, proper belt tracking is necessary. It guarantees that the belt moves straight and central on the walking platform, ensuring maximum performance.

Why Your Treadmill Belt Might Be Slipping
As a treadmill user, you may experience slipping issues with the running belt. Here are some possible reasons why your treadmill belt might be slipping.
1. Running belt too loose:
If your running belt is loose, it can cause continuous slipping, which can be risky during your workout. The treadmill’s walking belt can come off the walking platform, and the edges of the belt can rub against the motor cover, causing damage. To fix this issue, adjust the tension on your running belt until it is snug but not too tight.
2. Belt needs lubrication:
The treadmill belt needs periodic lubrication to reduce friction between the belt and the deck. Without proper lubrication, the running belt can slip to either side, slowing down your workout, and can cause the motor to work harder, leading to overheating. Ensure that you apply lubrication every quarter (3 months).
3. Drive belt getting loose:
If your treadmill drive belt is loose, it can cause the running belt to slip as there will be an insufficient transfer of power from the motor to the belt. You can tighten the drive belt by sliding the motor in the opposite direction of the loose belt. This will help ensure that the belt stays in alignment with the motor.
Regular maintenance, including proper belt tensioning, ensure that the treadmill’s belt stays central, and the machine remains in good condition.
How to Adjust Treadmill Belt
In this section, we will provide you with a step-by-step process on how to adjust your treadmill belt to ensure a smooth and safe workout every time.
Supplies Needed
To properly adjust the tension of your treadmill belt, there are a few supplies you will need to gather beforehand. Here is a list of the essential tools you need:
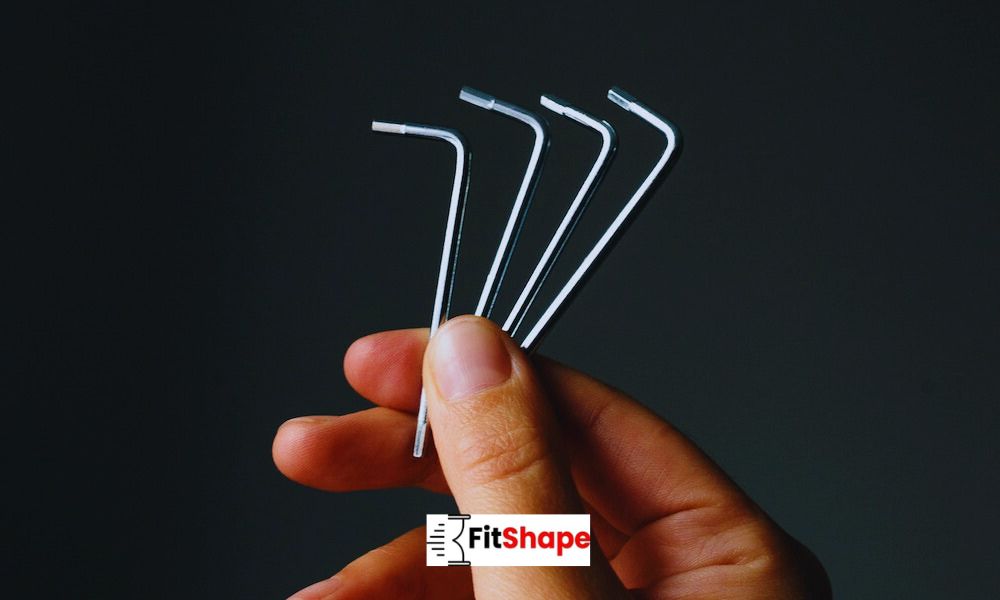
- Allen Key: Depending on the make and model of your treadmill, an Allen key may be the only tool required. However, if you don’t have one or find it challenging to use, consider purchasing an Allen key with a longer handle or more leverage for easy use.
- Towel: It’s a great idea to have a towel nearby to clean away any dirt or dust that may have accumulated under the treadmill over time. Keeping the area clean will prevent any dirt from clogging the belts and rollers.
- Lubricant: A treadmill lubricant is essential for the proper maintenance of your treadmill. It is formulated to keep the treadmill running smoothly, and a small amount will be needed to lubricate the treadmill belt.
- Gloves: Wearing a pair of gloves will prevent any accidental injury by avoiding direct contact of your fingers with the treadmill belt. The gloves also make it easier to spread the lubricant evenly.
Having these essential tools ready beforehand will save time and ensure you can make the proper adjustments to your treadmill belt without any hassle.
Step 1: Stop the Treadmill
The first and most important step in adjusting your treadmill belt is stopping the machine and unplugging it from the power source. This is a critical safety measure that should never be overlooked.
Before performing any maintenance or adjustments, make sure that the machine is completely powered off.
This means that you need to hit the stop button and wait a few seconds until the machine has come to a complete halt.
Stopping the treadmill will eliminate any risk of potential injury from moving parts, including the motor belt, drive belt, and walking platform.
Never attempt to adjust your treadmill while it is still running or in motion as this can cause damage to the machine and pose a serious safety hazard to you and others around you.
Ensure that your treadmill is completely powered off before proceeding to the next step. This simple safety measure can help prevent accidents and ensure that your treadmill maintenance is performed successfully.
Step 2: Pick Up An Allen Key
Once you have ensured that your treadmill is turned off and all moving parts have come to a complete stop, it’s time to begin adjusting the walking belt tension. The essential tool you’ll need is an Allen key, which is either included with your treadmill or available for purchase at a hardware store.
Before proceeding, locate the bolts on the back end of your treadmill. These bolts correspond to where the back roller of your treadmill is located. Once you have identified the bolts, find an Allen key that fits snugly inside the bolt and is correctly aligned.
It’s recommended to choose an Allen key with a longer handle, which allows for better leverage and an improved grip. This ensures that you can adjust the bolts easily without any slippage or potential damage to the bolts.
Now that you have the necessary tool, you’re ready to tighten the belt. Remember, if the belt is loose or slipping, it can cause significant damage to other parts of your treadmill.
Start by making a quarter turn clockwise on each side, starting at 12:00 and adjusting it to 3:00. After each turn, wait for 10-20 seconds to assess the impact on the belt tension. If the treadmill belt is still loose, continue with another quarter turn until you achieve the correct belt tension.
It’s important to note that you should not exceed three full turns at a time to avoid overtightening. Always adjust the left bolt, as this is the one used for alignment. This ensures that your belt remains centred and aligned with the walking platform.
Step 3: Turn the Treadmill On
After ensuring that the treadmill is turned off and all moving parts have come to a complete stop, it’s time to turn the machine back on without anyone on it. This step is necessary to check if the belt is centred before adjusting the tension.
Once the treadmill is turned on, set it to the recommended speed, which usually ranges between 2-5 mph (3.5-8 kph) depending on the type of fitness equipment and exercise machine you have.
Next, step onto the treadmill belt to check if it’s properly tense. While you’re standing on the belt, try to get it to stall with your foot to test the belt tension.
If the belt is too loose, you’ll hear the motor stall out before the belt stops moving. At this point, you need to adjust the tension by following the steps mentioned in the previous section.
Checking the treadmill belt tension is a crucial step to ensure safe and effective workouts. A correctly adjusted belt will not only prevent belt damage, belt seam separations, and frayed belts, but it will also help prevent injuries to treadmill users during exercise.
Adjusting the belt tension on your electric treadmill is a simple process that requires periodic checks and proper maintenance. Remember to perform this belt tension test before starting your workout to avoid any accidents or injuries.

FAQs on How to Adjust Treadmill Belt
Here are some commonly asked questions:
Why does the treadmill belt keep moving to one side?
If your treadmill belt keeps moving to one side, it may be due to an imbalance of tension. To fix this issue, begin by determining which side the belt slips to. Afterwards, locate the rear bolt on that side and turn the machine to 3 MPH (5 KPH). Using the proper wrench, rotate the bolt in quarter turns to the right until the belt re-centres. Remember to ensure that both roller bolts are equally tight to prevent the machine from leaning to one side.
How do I know if my treadmill belt needs adjusting?
If your treadmill belt is slipping or sticking, squeaking, or if there is a noticeable gap between the belt and the walking platform, it is likely that your treadmill belt needs adjusting.
What are some common mistakes to avoid when adjusting treadmill belt tension?
Some common mistakes to avoid when adjusting treadmill belt tension include over-tightening the belt, adjusting the belt while the treadmill is still plugged in, and not following the recommended process outlined in your treadmill user manual.
How do you tell if the treadmill belt is too loose or too tight?
To determine if your treadmill belt is too loose or too tight, slide your hand between the belt and the deck at the centre. If you can lift the belt more than three to four inches, it is too loose. If you can’t lift the belt more than three inches, it is too tight. Adjusting the belt tension is crucial to prevent damage to your treadmill and ensure optimal performance. Always keep an eye on the treadmill belt tension, and make sure it is adjusted correctly.
When should to replace the treadmill belt?
Knowing when to replace your treadmill belt is important for proper maintenance of this type of fitness equipment. Signs that indicate a need for replacement include frayed edges or loose threads, misalignment, large seam separations, and gaps between the belt and the walking platform. If the belt speed fluctuates, unusual noises come from the motor or belt, or the belt wears unevenly, it’s time to replace the belt. Keep an eye out for these signs to ensure that you are using your exercise machine safely and effectively.